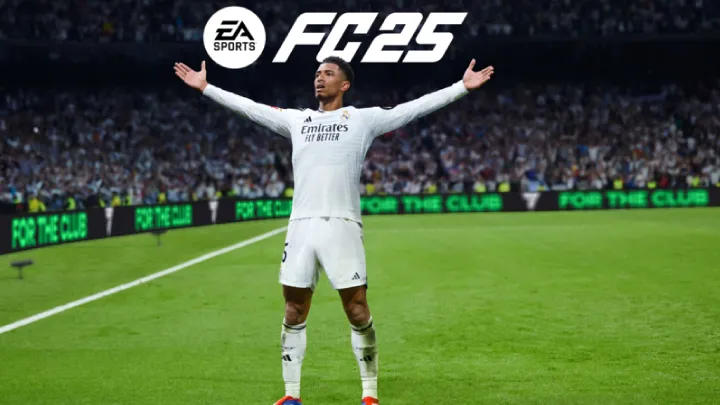
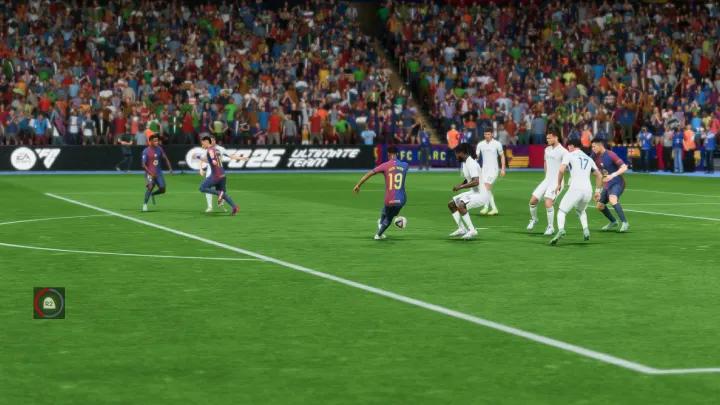
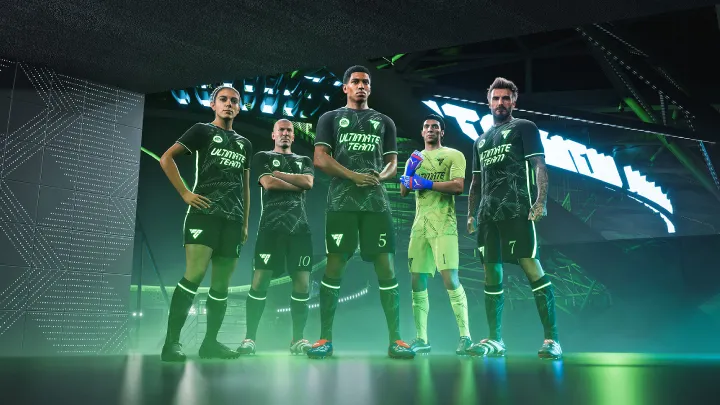
How to Master EA Sports FC 25: A Comprehensive Guide to Controls, Ultimate Team, and Tactical Supremacy

The EA Sports FC series continues its legacy as the world's premier digital football simulation, offering depth across its modes, from the strategic management of Career Mode to the competitive frenzy of Ultimate Team (UT). EA Sports FC 25 promises to refine the gameplay, introduce new HyperMotion-driven animations, and iterate on the popular PlayStyles system. For new players, the sheer volume of mechanics can be daunting, and for veterans, understanding the subtle shifts in the meta is key to victory. This ultimate "How To" guide is structured to take you through every phase of mastering the game, focusing on foundational controls, efficient Ultimate Team progression, and advanced tactical execution that separates the champions from the casuals. Mastery in FC 25 is a holistic endeavor, demanding technical skill on the sticks, intelligence in squad building, and tactical acuity in every match.
 1. How to Set Up: Initial Controls and Optimal Camera Settings (The First Hour)
Your journey to dominance begins before kickoff, ensuring your control scheme and visual settings provide maximum clarity and responsiveness. The default settings are often suboptimal for competitive play.
Calibrating Your Controller and Input Settings
The first step is to visit the settings menu and adjust the controller settings. For competitive players, the most critical changes involve switching to Competitive Master Switch: On, which disables certain quality-of-life assists like auto-clearance and helps you develop manual skill. Furthermore, setting your Passing Assistance and Shooting Assistance to Semi instead of Assisted offers more manual control over power and direction, which is essential for placing precise through balls and curlers past the goalkeeper. Finally, ensure your Through Ball Assistance is set to Manual for maximum control over depth and pace.
Selecting the Tactical Advantage with Camera Angles
The camera setting is one of the most overlooked aspects of the game. The camera you use directly impacts your field of vision and ability to track runs.
- Tele Broadcast: The most popular setting for competitive play.
- Depth: Typically set to 20 to give a wider view of the pitch.
- Height: Adjusted to 0 to minimize distortion.
- Co-op: Provides the widest view of the pitch, allowing you to see almost all 22 players at once. While excellent for vision, it can make players feel small and complicate close-control dribbling. Test both to find the best fit for your style.
2. How to Defend: Mastering the New Jockey and Interception Mechanics (Weeks 1-2)
Defense in the FC series is a balance between manual control, timing, and intelligent use of the $\text{A}I$ defense. Pure aggression is often punished, demanding patience and positional discipline.
The Art of Manual Jockeying and Containment
Jockeying (holding $\text{L2}/\text{LT}$) is the cornerstone of effective defense. It keeps your player facing the opponent and allows you to adjust your speed to match the attacker's run.
- Standard Jockey: (Holding $\text{L2}/\text{LT}$) Used for initial containment and positioning.
- Speed Jockey: (Holding L2/LT+R2/RT) Used to cover more ground quickly while maintaining a defensive posture, essential for tracking fast wingers.
- The goal of jockeying is not to tackle immediately but to cut off passing lanes and force the attacker toward the touchline or a waiting teammate. Never commit to a tackle (Circle/B) unless you are confident in the timing and position.
Defensive Utility: The Second Man Press and Standing Tackles
The $\text{A}I$ controlled "second man" can be called in to press the opponent ($\text{R1}/\text{RB}$), creating a defensive overload. Use this sparingly, as it pulls a player out of position, potentially opening a passing lane.
- When to use Second Man Press: Use it primarily to pressure a player in the midfield or a slow build-up player, never in your penalty box.
- Standing Tackles (Circle/B): Only attempt a standing tackle when you are shoulder-to-shoulder with the attacker, or when the attacker has just performed a loose touch. Missed tackles leave you flat-footed and easily beaten.
3. How to Attack: Precision Passing and Build-Up Play (The Mid-Game Cycle)
Successful attacking is about creating space and exploiting numerical or positional advantages. This involves a calculated build-up, not just relying on pace.
The Dynamics of Precision and Driven Passes
FC 25 often rewards calculated passing over constant through-ball spamming.
- Driven Pass ($\text{R1}/\text{RB} + \text{X}/\text{A}$): A fast, low-to-the-ground pass that is difficult for $\text{A}I$ defenders to intercept. Use this to quickly switch play or break lines in the midfield.
- Precision Through Ball ($\text{R1}/\text{RB} + \text{Triangle}/\text{Y}$): A manually aimed through ball that requires a higher skill ceiling but allows for pixel-perfect placement to send a runner in behind the defense. The key is to aim into the space where the runner will be, not where they currently are.
Advanced Attacking Controls: Player Lock and $A.I.$ Runs
To bypass congested midfields, you need to manually control your runners and passing options.
- Player Lock ($\text{L3} + \text{R3}$ or $\text{L1}/\text{LB} + \text{R1}/\text{RB}$ simultaneously): Allows you to lock onto a receiver and control their run after passing the ball, letting the $\text{A}I$ deliver the pass. This is crucial for creating confusion in the box.
- Calling for Runs ($\text{L1}/\text{LB}$): Tap $\text{L1}/\text{LB}$ to send a selected teammate on a forward run. Double-tap $\text{L1}/\text{LB}$ to perform a Directed Run, using the right stick to dictate the precise direction of the run, essential for curved runs behind the defense.
 4. How to Score: Finesse Shots, Trivela, and Set Pieces (Goal-Scoring Arsenal)
The finishing mechanics are diverse, and mastering several shooting types is necessary to break down different defensive setups.
Mastering the Meta Shots: Finesse and Trivela
The two most powerful shooting techniques typically dominate the meta:
- Finesse Shot ($\text{R1}/\text{RB} + \text{Circle}/\text{B}$): This curved shot is ideal from the edge of the box or inside the box when shooting across the goalkeeper. Players with the Finesse Shot PlayStyle+ are lethal with this.
- Ideal Scenario: Shooting from a slight angle on the weak side of the goalkeeper.
- Trivela Shot ($\text{L2}/\text{LT} + \text{Circle}/\text{B}$): An outside-of-the-boot shot, often used when a player is on their weak foot and needs to curve the ball around the keeper. It is exceptionally effective from outside the box for certain players.
Corner Kick and Free Kick Strategy
Set pieces often decide close matches. Avoid the temptation to cross a corner every time.
- Corner Kick ($A.$): Pass the ball short to a nearby attacker. This drags an $\text{A}I$ defender out and opens a different passing angle into the box, allowing for a low-driven cross or a simple pass-and-shoot.
- Free Kick ($B.$): Focus on the Power Shot ($\text{L1}/\text{LB} + \text{R1}/\text{RB} + \text{Circle}/\text{B}$) for direct attempts. Aim for the corner opposite the keeper's starting position and hold the power bar to about 70-80% to ensure accuracy and dip.
5. How to Dribble: Close Control and Skill Moves (One-on-One Engagement)
Dribbling is not about executing flashy skill moves constantly; it's about shifting weight and creating space for a pass or a shot.
The Importance of Controlled Dribbling
Controlled Dribbling ($\text{L1}/\text{LB}$) is the most fundamental and effective form of dribbling. It keeps the ball extremely close to the player's feet, allowing for rapid changes of direction. Use this in tight spaces, such as inside the penalty box or when receiving a pass under pressure. It's often more effective than complex skill moves for retaining possession.
Essential Skill Moves for Competitive Play
While hundreds of skill moves exist, only a handful are consistently reliable for creating separation:
- Ball Roll (Right Stick $\rightarrow$ Left Stick $\leftarrow$): A two-star move that shifts the ball to the side quickly. Use this in the box before a shot or to quickly change direction when a defender is pressing.
- Heel-to-Heel (Flick $\text{R}$ stick forward, then backward): A four-star move that propels the player forward, often breaking the ankles of a defender using the standing tackle.
- Elastico/Reverse Elastico: High-level, five-star moves that are exceptionally difficult to master but are unmatched for quick, deceptive direction changes on the wing.
6. How to Build Your Ultimate Team: Budgeting and Squad Foundations (Early Game UT)
Ultimate Team is the most popular and complex mode, requiring shrewd financial management and a deep knowledge of player chemistry.
Budget Squad Building: The Starter $\text{X}I$
In the first few weeks, focus on players from one league (e.g., Premier League or La Liga) to achieve maximum Chemistry. Chemistry links boost player stats, so this is non-negotiable.
- Prioritize Pace (PAC) and Defense (DEF): In the early meta, fast players are paramount. Look for cheaper defenders with high pace to compensate for potential lack of defensive awareness.
- The "PlayStyles" Edge: Identify budget players with strong, meta-relevant PlayStyles, such as Rapid (for wingers) or Block (for defenders), as these traits can outperform higher-rated players without them.
Maximizing Coin Generation: Trading and Objectives
Coins are the lifeblood of UT. You need to maximize coin generation without resorting to spending real money.
- Match Rewards: Complete all daily and weekly objectives. These provide packs, coins, and $\text{XP}$.
- Squad Battles: Play Squad Battles (offline) to earn weekly ranked rewards, which are packs and coins.
- Transfer Market Trading ($\text{H}4$): Learn simple trading methods, such as Flipping Consumables or Mass Bidding on high-demand, low-rated players needed for Squad Building Challenges ($\text{SBCs}$). Buy low, sell higher.
 7. How to Progress Ultimate Team: $\text{SBCs}$ and Weekend League (Mid-Game UT)
As your squad improves, your focus shifts to the more rewarding, but demanding, competitive modes and advanced squad building challenges.
Strategic Squad Building Challenges ($\text{SBCs}$)
$\text{SBCs}$ are crucial for obtaining high-tier, untradeable players.
- The "Meta" $\text{SBCs}$: Always complete the foundational $\text{SBCs}$ (e.g., Hybrid Leagues/Nations) and the weekly Player Picks which offer the chance for high-rated cards.
- The Player $\text{SBCs}$ Rule: Only commit coins/players to Player $\text{SBCs}$ (specific high-rated player cards) if that player fits your team for the next 2-3 months or has a PlayStyle+ that is game-changing. Avoid $\text{SBCs}$ for players that are only marginally better than those available on the Transfer Market.
Conquering FUT Champions (Weekend League)
FUT Champions (Weekend League) is the pinnacle of UT competition, offering the best rewards.
- Preparation: Ensure your team has maximum chemistry and you have high-rated subs.
- The Grind: Aim for the rank that gives you the best return for your time. For many, this is 11 Wins or 14 Wins, which provide excellent player picks and a significant coin boost. Don't play matches when you are feeling frustrated or tired.
8. How to Dominate Career Mode: Scouting and Tactical Management (Single-Player Depth)
Career Mode offers a deep, single-player experience focusing on management, scouting, and player development.
Scouting for the Next Generation
Successful Career Mode runs rely on identifying and developing future superstars.
- Scouting Network Priority: Invest heavily in youth scouts with high Experience and Judgment.
- Focus on Traits: Instruct your scouts to look for players with high potential in specific roles (e.g., "Physically Strong" or "Winger"). Target players with high Potential (18-22 years old) to maximize their growth.
Player Development and Training Plans
You must actively manage your players' growth to ensure they hit their potential.
- Training Plans: Assign training plans that align with the position you want the player to play. For example, a young striker should be placed on a Target Man or Poacher plan to boost their finishing and attacking positioning.
- Morale and Form: Keep your players happy by rotating the squad and providing appropriate playtime. High Morale directly translates to better in-game performance and faster development.
9. How to Adapt: Formations, Custom Tactics, and PlayStyles (In-Game Strategy)
A static formation and set of tactics will fail against a skilled opponent. Mastery requires fluid tactical shifts.
Custom Tactics: The Four Pillars
Use four different Custom Tactics slots to set up formations and mentalities for different situations.
- Default (Balanced): Your primary, well-rounded formation (e.g., 4-4-2 or 4-2-3-1).
- Attacking (Press): A high-risk, high-reward formation for chasing a goal (e.g., 4-2-4). Set Press After Possession Loss and high Depth (70+).
- Defensive (Park the Bus): A compact formation for holding a lead (e.g., 5-4-1). Set Drop Back and low Depth (30-40).
- Ultra Attacking (Overload): An all-out assault for the final minutes.
Player Instructions: Defining Roles
Instructions ensure your players execute your tactical vision.
- Strikers: Set the primary striker to Stay Central and Get In Behind.
- Defensive Midfielders (CDMs): Set to Stay Back While Attacking and Cover Center to protect the back four.
- Wingbacks (FBs): In a four-back formation, set them to Stay Back While Attacking to prevent counterattacks. In a three-back formation, set them to Join the Attack.
10. How to Advance: Competitive Mindset and Meta Exploitation (High-Level Play)
The final step is adopting the mindset of a high-level competitor, focusing on mental game and continuous learning.
The Competitive Mindset and Tilt Control
Losing often causes "tilt," where frustration leads to poor decisions.
- Take Breaks: If you lose two matches in a row, step away from the game for 15-30 minutes. Reset your mental state before returning.
- Review Replays: After a loss, quickly review the goals conceded. Was it a formation issue, a tactical error, or poor manual defending? Don't blame the game; learn from the mistake.
Exploiting the Meta and Learning from the Pros
The competitive scene evolves weekly based on new patches and player discoveries.
- Watch the Best: Follow top players and professional $\text{FC}$ athletes on Twitch and YouTube. Pay attention to:
- The specific skill moves they use.
- The angles and power they use for the Finesse or Trivela shot.
- How they defend against the most popular meta tactics.
By continuously observing and integrating these high-level strategies, you ensure your game evolves as quickly as the competitive landscape, maintaining your edge and cementing your status as an $\text{FC}$ master.
Mastering EA Sports FC 25 requires a comprehensive approach covering mechanical skill (jockeying, precision passing, finesse shots), strategic management (UT trading, $\text{SBCs}$, Career Mode scouting), and tactical fluidity (custom tactics, player instructions). Success is built on foundational controls, defensive discipline, diverse attacking methods, and a relentless commitment to adapting to the ever-shifting competitive meta and improving your mental game.