.webp)
Burn With Me Guide: How to Solve Pentagram Rituals and Maximize Every Card

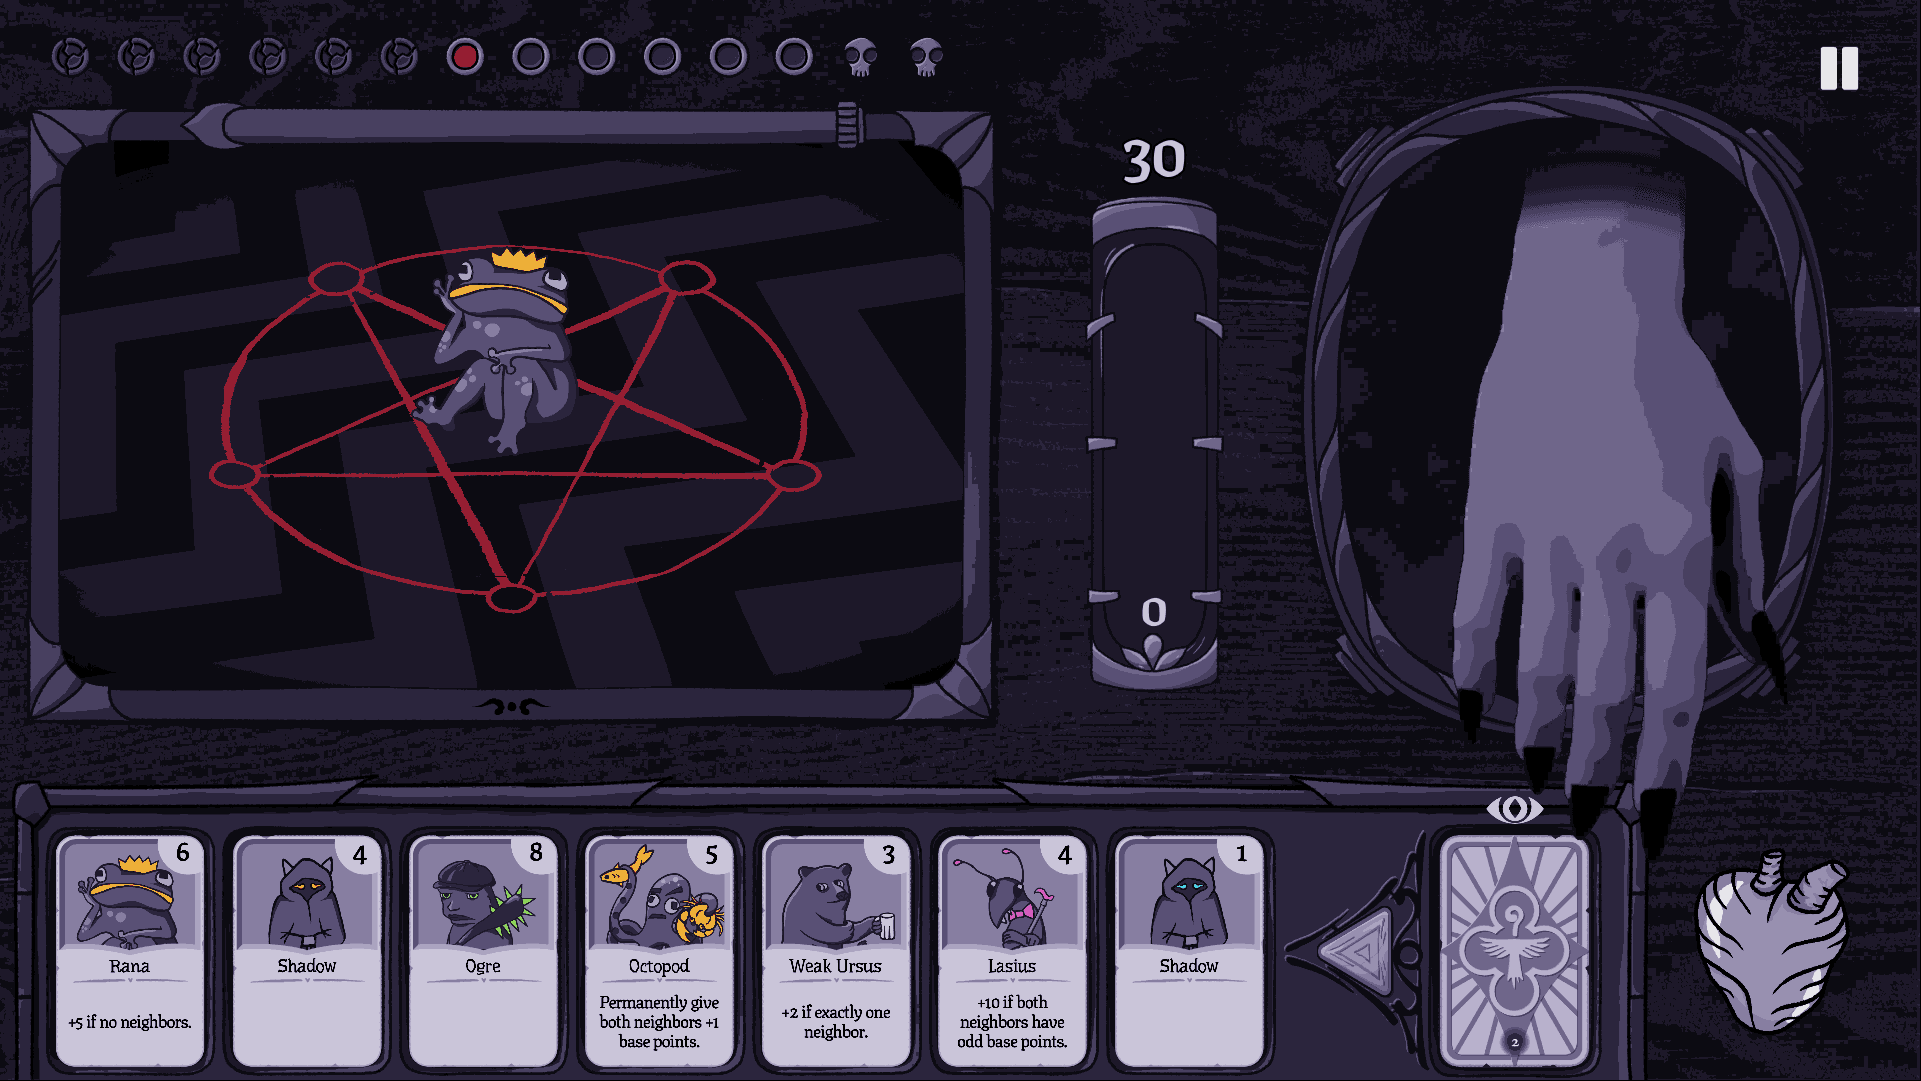
Burn With Me transforms deckbuilding into a sequence of tightly controlled occult puzzles. Instead of relying on an oversized deck, endless upgrades, or explosive combinations, players must place exactly five cards around a pentagram and reach a specific score threshold. Each card contributes its own value, but its position can be just as important as its printed points. A seemingly powerful card can become inefficient when placed in the wrong location, while a modest card can become essential when it activates bonuses from neighboring cards.
The central challenge is that every ritual asks you to make several decisions at once: which cards to select, where to place them, which abilities to activate, and whether a card is worth sacrificing permanently. The score requirement also increases as the game progresses, leaving less room for careless placements. As described in Thinky Games’ analysis of the demo, the five-point pentagram and its positional interactions are the foundation of the game’s strategic puzzle. This guide focuses specifically on solving those rituals efficiently, preserving useful synergies, and managing the permanent consequences of burning cards.
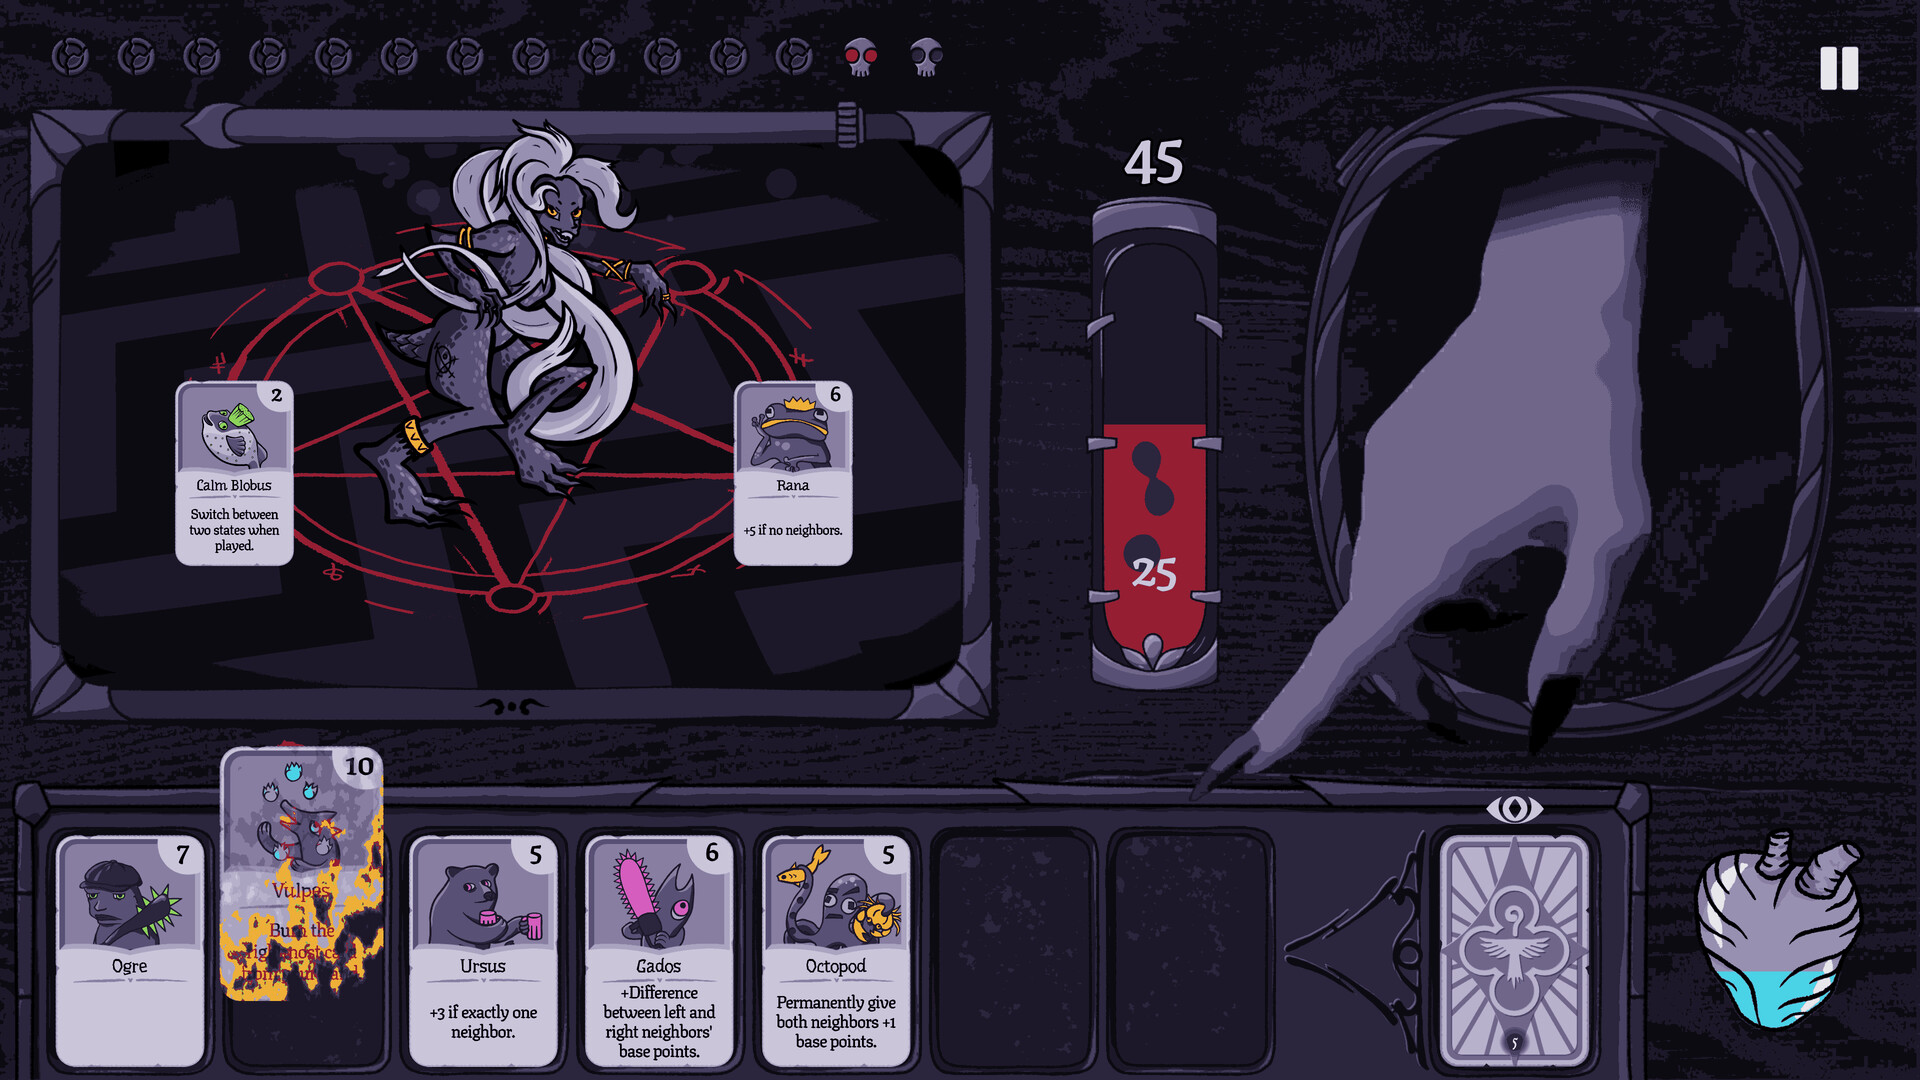
1. Understand the Five-Card Pentagram Before Choosing Your Strategy
The first step toward consistent success is understanding that a ritual is not simply a race to play your highest-value cards. The pentagram has five points, and the player must fill them with exactly five cards while exceeding the current score requirement. Each position influences the potential value of a card because some effects depend on nearby cards, while others benefit from particular arrangements. Consequently, the total printed value of your hand is only the beginning of the calculation.
Think of the pentagram as a small tactical board rather than a conventional card-playing area. Every placement changes the conditions under which other cards operate. A card that rewards neighboring cards may be stronger in the center of a cluster, whereas a card that prefers isolation can lose value if placed beside other cards. The goal is to make the five cards work together, not merely to put five individually impressive cards on the board. <Cite refs={["turn833542view0","turn833542view2"]} />
Identify What Each Card Actually Rewards
Before committing to a placement, read the card's value and ability separately. Its base value tells you what it contributes directly; its ability tells you how the board may change that contribution. Some cards improve themselves or nearby cards, others interact with particular neighboring values, and some offer an immediate benefit in exchange for being permanently destroyed. These effects create different placement priorities.
Use a simple classification system while inspecting your hand:
- Base-value cards: Provide points without requiring a complicated arrangement.
- Neighbor-dependent cards: Gain value from adjacent cards or particular positions.
- Condition-based cards: Need a specific arrangement, such as empty neighboring spaces or odd-numbered cards on either side.
- Sacrifice cards: Offer a benefit but destroy themselves after use.
- Deck-support cards: Help other cards score more effectively or improve future rituals.
This is a practical way to organize your thinking, not a separate in-game card classification system. Its purpose is to help you identify which cards need specific positions before you place the cards whose value is more straightforward.
Calculate the Board as a Whole
Avoid evaluating a card in isolation when its ability affects another position. If a card grants two additional points for each neighboring card, for example, placing it between two eligible neighbors could produce four bonus points rather than two. That difference can decide whether a ritual succeeds. <Cite refs={["turn833542view0"]} />
Before placing a card, ask what changes if it occupies the current point instead of another one. Does it gain a neighbor? Does it block an isolation bonus? Does it improve two other cards at once? These questions turn the pentagram into a small optimization problem and prevent you from overlooking points that are available through positioning rather than higher base values.
2. Read the Score Threshold Before Committing to a Ritual
Every ritual has a target that your final score must exceed. As the requirements increase, the same five-card arrangement that worked earlier may no longer be sufficient. This is why you should check the target before planning your placements instead of relying on intuition from previous encounters. Your objective is to build an arrangement that reliably clears the current requirement, not one that would have been adequate several rituals ago. <Cite refs={["turn833542view0","turn833542view2"]} />
Start by estimating how much value your five cards can generate without special interactions. Then identify the bonuses that could close the gap. This gives you a clear picture of which abilities matter most. If your base values already approach the target, one well-positioned bonus may be enough. If the initial total is much lower, you will need to prioritize a more powerful combination or rethink your card choices before beginning the ritual.
Use a Score-Budget Approach
A score budget helps you recognize how much each card needs to contribute. Imagine that the current ritual requires more points than your five cards provide at their base values. Instead of immediately playing everything, identify the shortfall and examine the abilities that could cover it.
A useful planning sequence is:
- Read the current target.
- Add together the five cards' expected base values.
- Identify bonuses generated by neighboring cards.
- Check whether conditional abilities can activate in your proposed arrangement.
- Compare the projected total with the required threshold.
- Adjust the placement before committing.
The numbers in this process are estimates until the cards are arranged and their effects resolve. Treat each ability according to its actual wording, and do not assume that every neighboring interaction stacks unless the card explicitly supports that interpretation.
Avoid Chasing Excessive Scores
The objective is to meet the ritual's requirement, not necessarily to produce the largest possible number. If your arrangement comfortably clears the threshold, adding complexity may create unnecessary opportunities for error. In a game where every ritual is a finite puzzle, reliable scoring is generally more useful than building a spectacular combination that depends on several fragile conditions.
This does not mean you should ignore a high-scoring opportunity. If an arrangement gives you extra value without sacrificing a more important future option, take advantage of it. The key is to distinguish free efficiency from a risky attempt to maximize every possible point.
3. Plan Card Placement Around the Five Pentagram Points
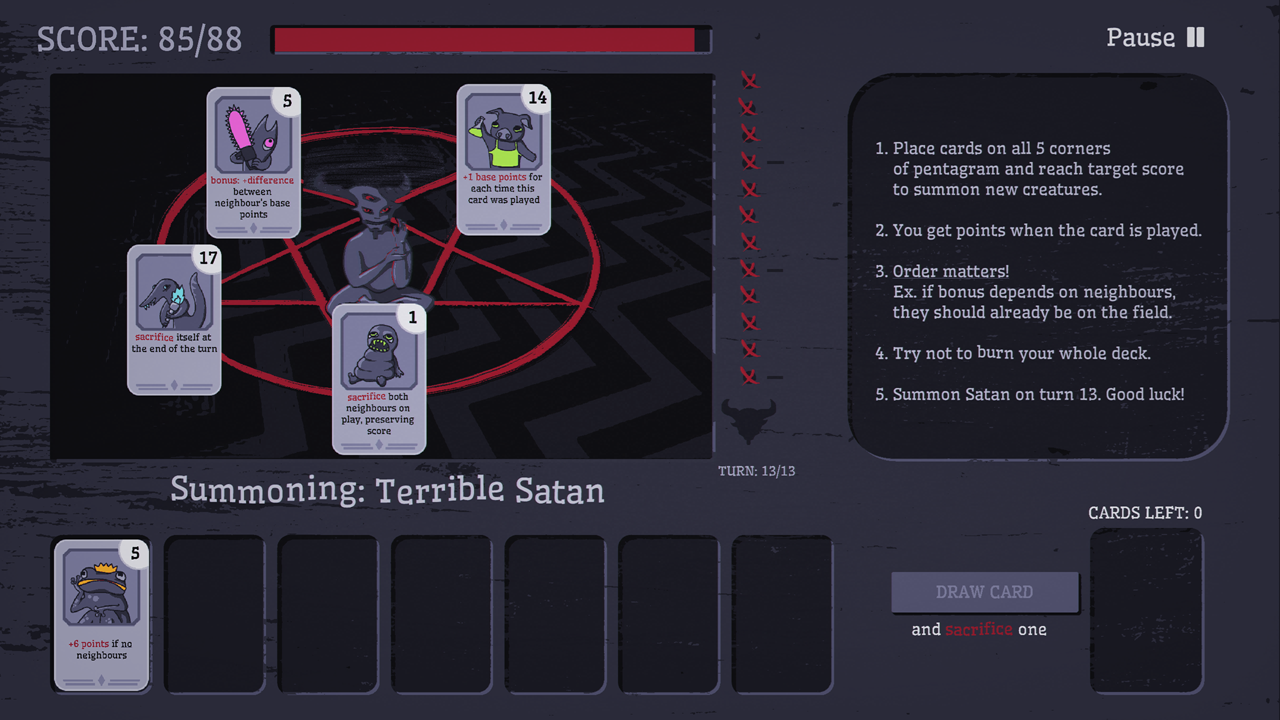
Once you understand the target, the next challenge is choosing where each card belongs. Because the pentagram has only five positions, a single placement can change the effectiveness of several cards. The best sequence is often to identify the cards with the strictest positional requirements first, then fit flexible cards around them. This reverses the instinct to begin with the strongest-looking card and fill the remaining spaces afterward.
Consider a card that benefits from having other cards beside it. Its potential depends on how many neighboring positions can activate the bonus. A card that needs empty neighboring spaces has the opposite requirement and should be protected from being crowded. If you place flexible cards first, you may accidentally occupy the exact spaces that a conditional card needs. Planning around restrictions prevents that problem.
Place the Most Restricted Cards First
Identify which cards would lose the most value if placed incorrectly. Cards that need to be isolated, depend on odd-numbered neighbors, or require a specific surrounding arrangement should influence your initial plan. Flexible cards can then occupy the positions that remain available.
A practical placement priority is:
- Cards with strict positional requirements.
- Cards that improve multiple neighboring cards.
- Cards that need specific values or conditions nearby.
- Cards with strong base values and few placement restrictions.
- Remaining cards that complete the arrangement without breaking existing bonuses.
This is a planning guideline rather than a mandatory sequence for every hand. If a particular card's effect depends on the order in which cards are played, you must account for that condition as well as the final arrangement.
Protect the Space Around Conditional Cards
Do not judge an empty neighboring point as wasted space before you understand the card's ability. Some cards benefit precisely because certain positions remain empty. Filling every available space with a high-value card may therefore reduce the final score rather than improve it.
When reviewing a possible arrangement, check the spaces immediately around each condition-based card. Ask whether a planned placement will activate or disable its effect. If the card's text refers to odd or even values, verify the relevant values rather than assuming the cards' order or appearance satisfies the condition.
4. Exploit Neighbor Bonuses Instead of Relying on Base Values
Neighbor bonuses are one of the clearest examples of why Burn With Me rewards deliberate positioning. A card that grants extra points for each adjacent card can improve its own contribution based on the arrangement. The bonus may look small when read in isolation, but its total effect can be significant when the card has multiple eligible neighbors. <Cite refs={["turn833542view0","turn833542view1"]} />
The main challenge is identifying the best position for the bonus card without damaging the rest of the arrangement. A card might gain value from two neighbors while simultaneously preventing another card from activating its own ability. You should therefore calculate the overall change to the board, not just the bonus received by the card you are currently placing.
Compare the Bonus Against the Opportunity Cost
Suppose one card gains two points for every neighboring card. With two eligible neighbors, it could gain four bonus points. However, if placing those neighbors in the required positions prevents a separate ability from activating, the arrangement may not be optimal. The useful question is how many points the entire arrangement gains or loses when you move the card.
Use this comparison when testing placements:
- What is the card's value before its ability activates?
- How many eligible neighbors does it have?
- Does its ability improve itself, its neighbors, or both?
- Does the placement disable another card's condition?
- Would a different position create a larger combined benefit?
You do not need to perform elaborate arithmetic for every move. With practice, you will begin recognizing patterns that produce reliable value. The calculation is most important when the ritual's score target is close enough that a small placement mistake could cause failure.
Do Not Assume All Cards Want to Be Grouped Together
Neighbor-based scoring encourages clustering, but clustering is not universally correct. Some cards benefit from being surrounded, while others require empty spaces or specific values around them. A compact arrangement can maximize one ability while undermining another.
Treat every card as part of a network of conditions. The strongest arrangement is the one in which the important effects coexist, not the one with the most neighboring cards. When two abilities conflict, compare their contributions and prioritize the combination that produces the most reliable route to the target.
5. Manage Card Order When Abilities Depend on Timing
Position is not the only consideration. The order in which you play cards can also matter, particularly when an ability depends on the state of the board at a particular moment. A final arrangement that appears correct may not deliver the expected result if a condition is checked before the relevant card has been placed or if an effect resolves in an unexpected order. <Cite refs={["turn833542view0","turn833542view2"]} />
This is why it helps to separate two questions: where should each card finish, and when should each card be played? A positional plan addresses the first question, while a sequence plan addresses the second. When a card's text refers to existing cards, neighbors, or a condition that may change during placement, verify whether the effect depends on the final board or the state at the moment of activation.
Create a Placement Sequence Before Playing
Start with the card whose ability most strongly dictates the arrangement. Then determine which other cards must be placed before or after it to activate the desired interactions. If a card depends on neighboring cards being present, placing it too early may not produce the same outcome as placing it after those neighbors, depending on the ability's rules.
Before confirming the sequence, check:
- Which positions must remain available for later cards?
- Which cards need other cards to be present first?
- Does any ability resolve immediately upon placement?
- Could a later card change the value or condition of an earlier one?
- Does the intended sequence preserve the required final arrangement?
These questions are especially useful when a hand contains several abilities that interact. A sequence that works for a simple five-card combination may be insufficient when one card boosts others and another destroys itself.
Learn From Unexpected Results
If the score differs from your prediction, do not immediately assume the game has behaved randomly. Review the card text and determine which interaction you misread. You may have counted the wrong neighboring positions, overlooked a condition, or misunderstood when an effect resolves.
That review is more valuable than simply memorizing one successful arrangement. Since card combinations can change between encounters, understanding why a placement works lets you apply the same principle to future hands with different cards.
6. Choose New Cards for Synergy, Not Just Immediate Power
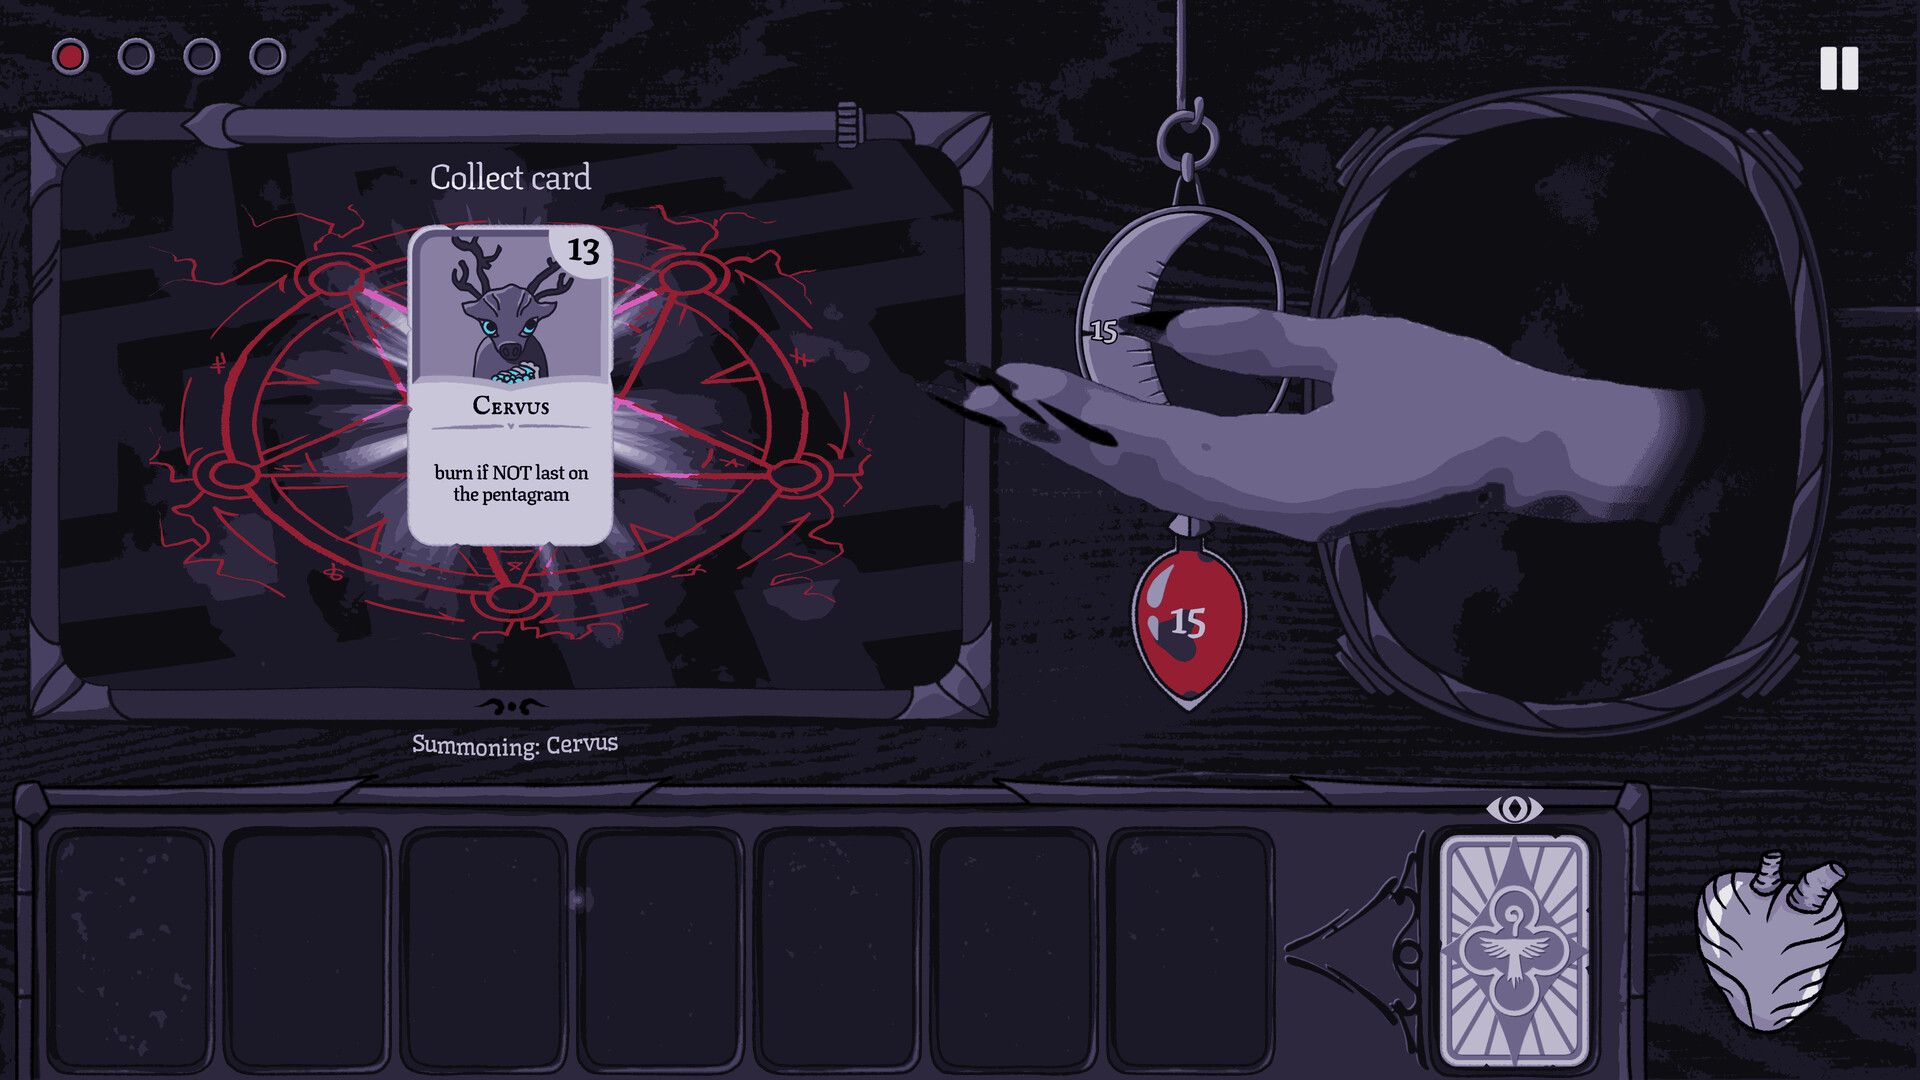
After a successful encounter, card selection can shape the options available in future rituals. In the demo, players choose one of three cards to add to the evolving deck. Many of these cards provide bonuses to themselves or neighboring cards, impose positional conditions, or offer points at the cost of permanent destruction. <Cite refs={["turn833542view1","turn415037search0"]} />
The most tempting choice is not always the most useful. A high-value card may help you reach the next score target, but a conditional card could provide greater value if your existing cards support its ability. Conversely, a card with a powerful effect may be unreliable if your current collection rarely produces the conditions it needs. Evaluate new cards according to the kinds of arrangements you can realistically build.
Evaluate Each Choice Against Your Existing Cards
When presented with three options, compare their immediate value, their conditions, and their likely contribution to future rituals. A card that rewards neighboring cards becomes more attractive if you already have several cards that can benefit from its position. A card that requires a narrow arrangement is less appealing if your other options are flexible and reliable.
Use these questions when selecting a card:
- Does its ability work with cards I already have?
- Can I activate its condition without sacrificing too much value elsewhere?
- Does it provide a useful role that my current options lack?
- Will it create more flexible arrangements or make my hands harder to solve?
- Does its benefit justify any permanent cost associated with using it?
Avoid evaluating cards solely by their printed numbers. A card with lower base value can contribute more when its ability matches the board, while a high-value card may be awkward if its placement requirements conflict with the rest of your hand.
Build Around Reliable Interactions
You do not need to force your entire strategy around one card. A flexible group of cards with compatible effects can be easier to use than a collection of powerful cards that all demand the same position. Look for combinations that allow several different placements to work, giving you options when a future hand does not contain the exact cards you expected.
This is especially important because the game introduces new cards and mechanics as the narrative progresses. A strategy that works in an early ritual may need to change when new conditions appear. Build an understanding of how cards interact rather than expecting one fixed combination to solve every encounter.
7. Understand Permanent Card Burning and Deck Thinning
Permanent card burning is one of the game's most important strategic trade-offs. Certain cards provide a benefit and then destroy themselves for the remainder of the game. This can feel costly because you lose a card that might otherwise appear in a future hand, but the sacrifice can also improve the value of the current ritual or support a broader strategy. <Cite refs={["turn833542view0","turn833542view1"]} />
The correct decision depends on what the card gives you now, what you lose later, and whether its removal helps the remaining deck. A card that offers a meaningful scoring boost at a critical moment may be worth sacrificing. On the other hand, permanently losing a card that enables an important positional combination can make later rituals harder. You should therefore think of burning as a long-term resource decision rather than a free bonus.
Calculate the Immediate Gain and Future Cost
Before using a self-destructing card, estimate how much it contributes to the current score. Then consider how often its ability could help in later encounters and whether other cards can replace its role. The fact that a card disappears does not automatically make the choice good or bad; its value depends on the situation.
A useful checklist is:
- Will the sacrifice help me meet the current ritual's target?
- Is the benefit large enough to justify losing the card?
- Does the card support an important synergy in future encounters?
- Would keeping it make later hands more flexible?
- Does the remaining deck still contain enough useful combinations?
If the card's immediate effect is necessary to pass a difficult encounter, sacrificing it may be sensible. If the current ritual is already secure, using the same card without a clear benefit may be wasteful.
Treat Deck Thinning as a Strategic Trade-Off
Removing a card can reduce future options, but it can also change the composition of the deck. The effect depends on which card disappears and how the remaining cards work together. Losing an awkward card may make future selections more focused, while losing a useful synergy piece may reduce consistency.
Do not assume that a thinner deck is always better. The objective is to preserve a set of cards that can solve future rituals, not to minimize the number of cards at any cost. Consider the quality of the remaining combinations rather than the deck's size alone.
8. Handle Difficult Rituals Without Restarting Blindly
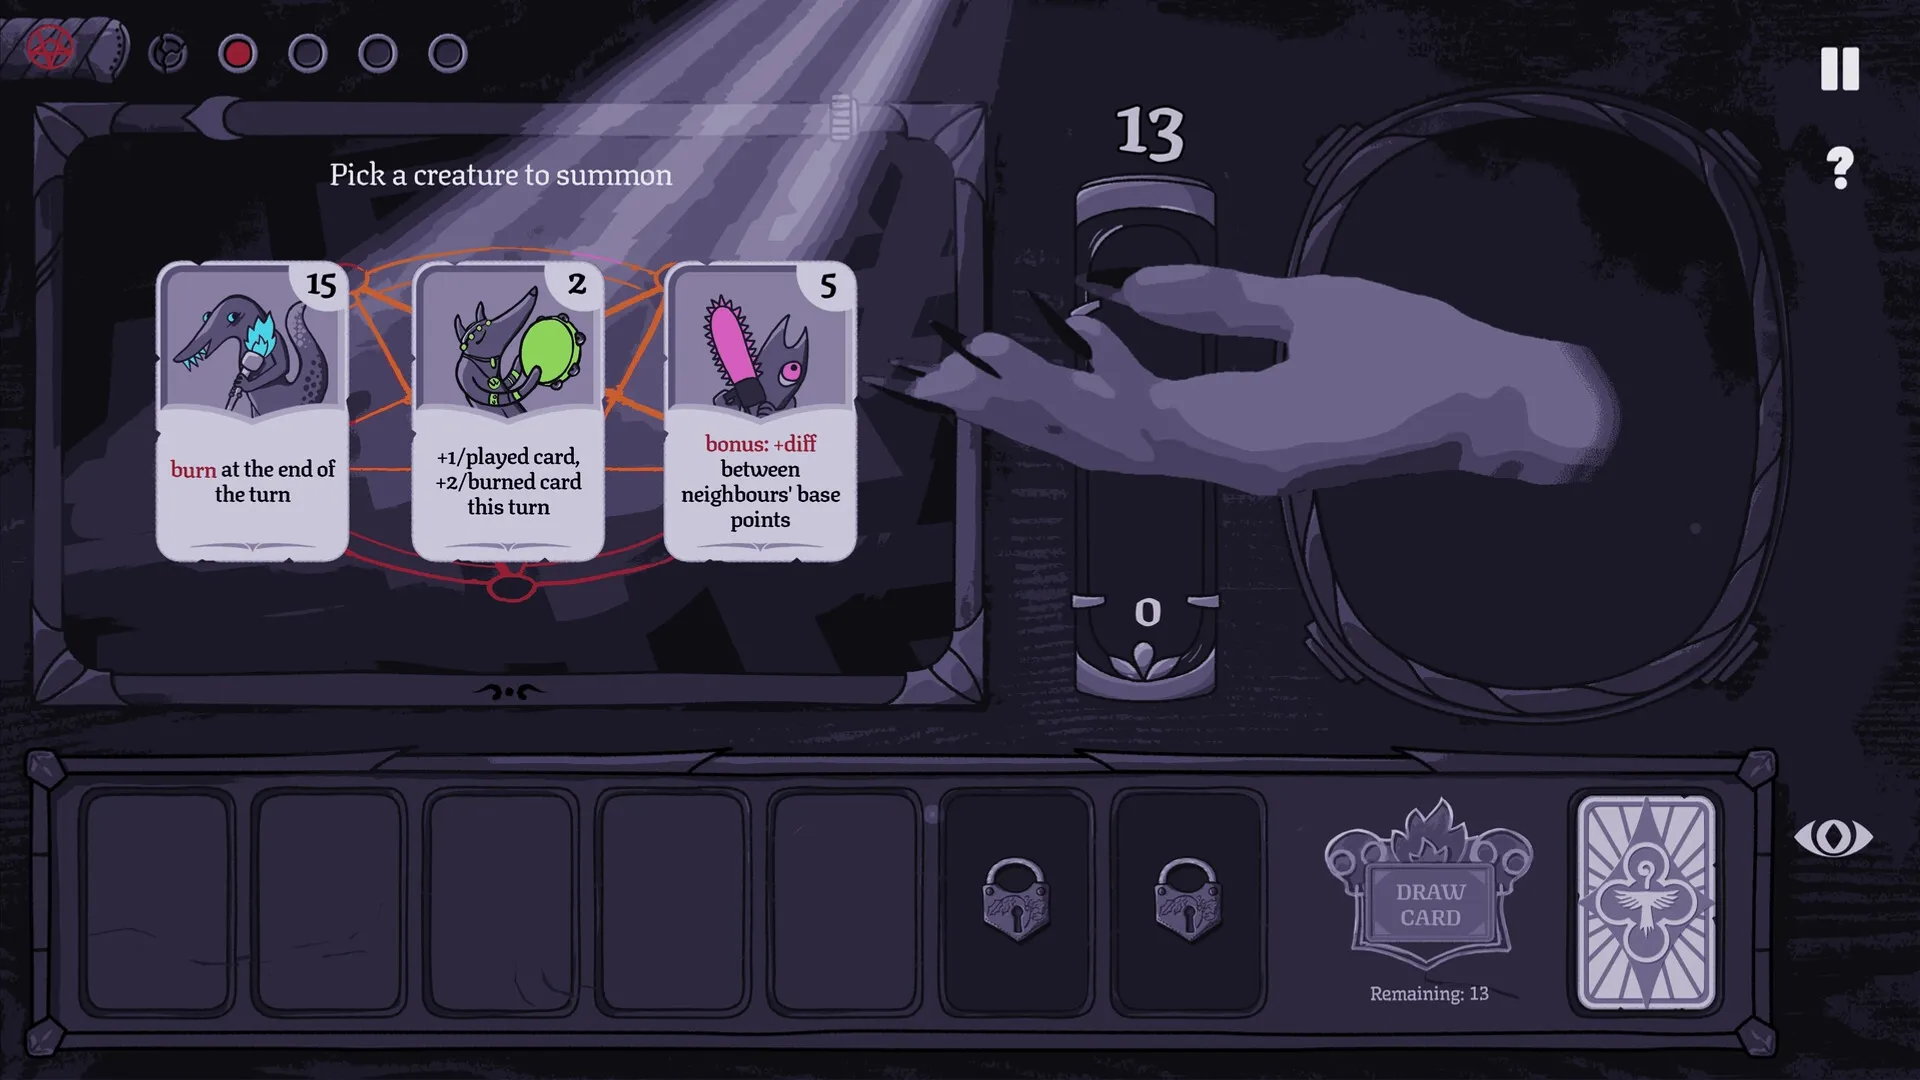
A failed ritual can be frustrating, especially when you miss the target by only a few points. But a near miss usually contains useful information: it tells you that your estimate of the board, your placement sequence, or your interpretation of a card's ability was incomplete. The game can send players back to an earlier point after failure, and that setback makes careful planning more valuable than repeating the same arrangement without changes. <Cite refs={["turn833542view0","turn833542view2"]} />
When a ritual becomes difficult, slow down and identify the exact source of the shortfall. If the base values were too low, you may need a different card selection. If the base total was sufficient but the final score fell short, inspect the positional bonuses. If a conditional ability did not activate, check the card's placement requirements and the order of play. Each type of failure calls for a different correction.
Diagnose the Failure Before Changing Everything
Avoid rebuilding your entire strategy after one unsuccessful attempt. Instead, identify the smallest change that could make the arrangement work. Moving one card might activate an additional neighbor bonus. Reordering two cards might satisfy a timing condition. Choosing a different card in a later selection might improve the deck's overall compatibility.
Use a simple failure review:
- Compare the expected score with the actual score.
- Identify which bonus or condition failed to contribute.
- Check whether the issue was placement, order, or card choice.
- Change one major variable at a time.
- Recalculate the arrangement before retrying.
This process helps you learn the game's rules more quickly. If you change everything simultaneously, you may succeed without understanding why, leaving you vulnerable to the same problem in a later encounter.
Recognize When the Deck Is the Problem
Sometimes the issue is not a single placement. Your available cards may lack the right combination of values and abilities for the current target. In that case, the solution may involve selecting better cards in future encounters or adapting your expectations about which bonuses are achievable.
Do not force an elaborate synergy when the current hand cannot support it. A simpler arrangement with reliable points may be better than a clever plan that depends on a condition you cannot satisfy. The important skill is recognizing the difference between a placement mistake and a limitation in the available cards.
9. Adapt Your Scoring Strategy as New Cards and Challenges Appear
As you advance, the game introduces new cards and abilities that change the types of arrangements you can build. This means your early habits should remain flexible. A strategy built around straightforward base values may work for simpler rituals, but more demanding targets can require precise positional interactions. Likewise, an arrangement that once produced reliable bonuses may become less useful when new cards introduce conflicting conditions. <Cite refs={["turn833542view0","turn833542view1"]} />
Rather than chasing a universal winning formula, build a small set of problem-solving habits. Recognize which cards need space, which ones benefit from neighbors, which abilities depend on timing, and which sacrifices have lasting consequences. These habits help you understand unfamiliar cards without needing to memorize every possible combination.
Change Your Priorities When the Target Rises
When the target increases, revisit the role of each card. A card that was useful mainly for its base value may no longer contribute enough. A card that provides a modest neighbor bonus may become essential because it can improve several positions simultaneously. Your planning should evolve with the score requirement rather than repeating a previous solution automatically.
At the same time, do not assume that a higher target always requires the most complicated combination. Sometimes the best answer is a straightforward arrangement with a few carefully chosen bonuses. Prioritize dependable points first, then use conditional effects to close the remaining gap.
Use Optional Difficulty as a Test of Understanding
If you unlock a harder version of a level, treat it as a test of your grasp of the scoring system rather than simply a demand to play faster. Increased pressure makes weak assumptions easier to expose. You will notice whether you truly understand the interaction between card value, position, and ability conditions, or whether you have been relying on arrangements that happened to work.
After a difficult encounter, record the principle behind your successful placement. For example, remember that a particular type of card benefits from being between two neighbors, or that an isolation effect requires you to leave nearby positions unused. These observations are more useful than memorizing a single sequence of cards because they can transfer to different hands.
10. Build a Repeatable Five-Card Ritual-Solving Routine
The most reliable way to improve in Burn With Me is to use the same reasoning process for every ritual while remaining flexible about the actual cards. Begin with the score target, classify the available cards by their abilities, identify the strictest placement conditions, and then arrange the remaining cards around those requirements. Before committing, verify both the expected total and the order in which effects resolve. This method reduces avoidable mistakes without turning every ritual into an unnecessarily long calculation.
The routine should also include the consequences that extend beyond the current board. When choosing a new card, consider whether it supports your existing combinations. When a card can destroy itself, compare the immediate benefit with the future cost. When a ritual fails, diagnose the specific reason instead of repeating the same plan. These decisions are connected: a strong current score is valuable, but so is preserving the tools needed to solve the next puzzle.
Follow This Checklist Before Every Ritual
Use the following sequence as a quick reference when you encounter a difficult board:
- Read: Check the exact score threshold and every relevant card ability.
- Classify: Separate flexible cards from those with strict positional conditions.
- Plan: Identify where the most restricted cards should go.
- Connect: Position neighboring cards to maximize compatible bonuses.
- Sequence: Check whether the order of placement affects any ability.
- Calculate: Estimate the total value of the complete arrangement.
- Commit: Play the cards only after checking the most important conditions.
- Review: If the result differs from your estimate, identify the interaction you missed.
Prioritize Consistency Over Perfect Optimization
You will not always discover the mathematically best arrangement immediately, and you do not need to. A reliable arrangement that clears the target is often preferable to an elaborate one that depends on several uncertain interactions. As your familiarity with the cards improves, you will become faster at recognizing strong positions and identifying which calculations actually matter.
Ultimately, Burn With Me rewards careful observation more than frantic experimentation. The five-point pentagram limits your options, but that limitation is also what makes each ritual understandable. By learning how to position cards, interpret abilities, manage permanent sacrifices, and review failed attempts, you can turn a confusing board into a sequence of manageable decisions.
Conclusion
The key to mastering Burn With Me is learning to treat each ritual as a five-card spatial puzzle with consequences that extend beyond the current score. The pentagram's positions determine how neighboring cards interact, while card order and conditional abilities can change the result of an otherwise promising arrangement. Reading the target first, protecting restricted positions, and calculating the full board will help you avoid the common mistake of playing five powerful cards without creating a coherent scoring combination.
Permanent card burning adds another layer of strategy because a useful immediate benefit may cost you an important option later. Choose new cards for their compatibility with your existing collection, review failed rituals carefully, and adapt when higher targets or unfamiliar abilities appear. With a repeatable planning routine and a willingness to evaluate every placement, you can solve rituals more consistently without depending on luck or a single memorized combination.